
Sometimes Christmas comes sooner than a busy person realizes! But there’s still nothing like creating and gifting a handmade card! This easy step-by-step tutorial can be used not just for Christmas, but any “wreath” occasion!
This post contains no affiliate links.

What you’ll need:
*Paper cutter or scissors
*2 white pieces of cardstock
*1 red Cardstock
*Green archival ink
*Red archival ink
*Q-tips
*Red ribbon
*Christmas quote stamps
*Glue or double sided tape
*Paper of choice for envelope (optional)
*Envelope template (optional)
*Washi tape (optional)
*Christmas stickers (optional)
Let’s make the card! This card-making recipe makes 4 cards.
The first step is to fold one sheet of white card stock horizontally, then open it, then fold it vertically, so that you have four equal squares.
Next, take a Q-tip, and press it into the green archival ink, then use it to stamp a wreath in a circle on one square of the card. The picture shows several Q-tips and that can work too, but I actually found it much easier to just use one.

I ended up using just one Q-tip instead of a bundle, but either way works.
Once you have all four squares with their wreaths, take a clean Q-tip and press it into the red archival ink, then stamp it into the wreath to create the ornament feel. You can stamp as many or as little red ones as you like.
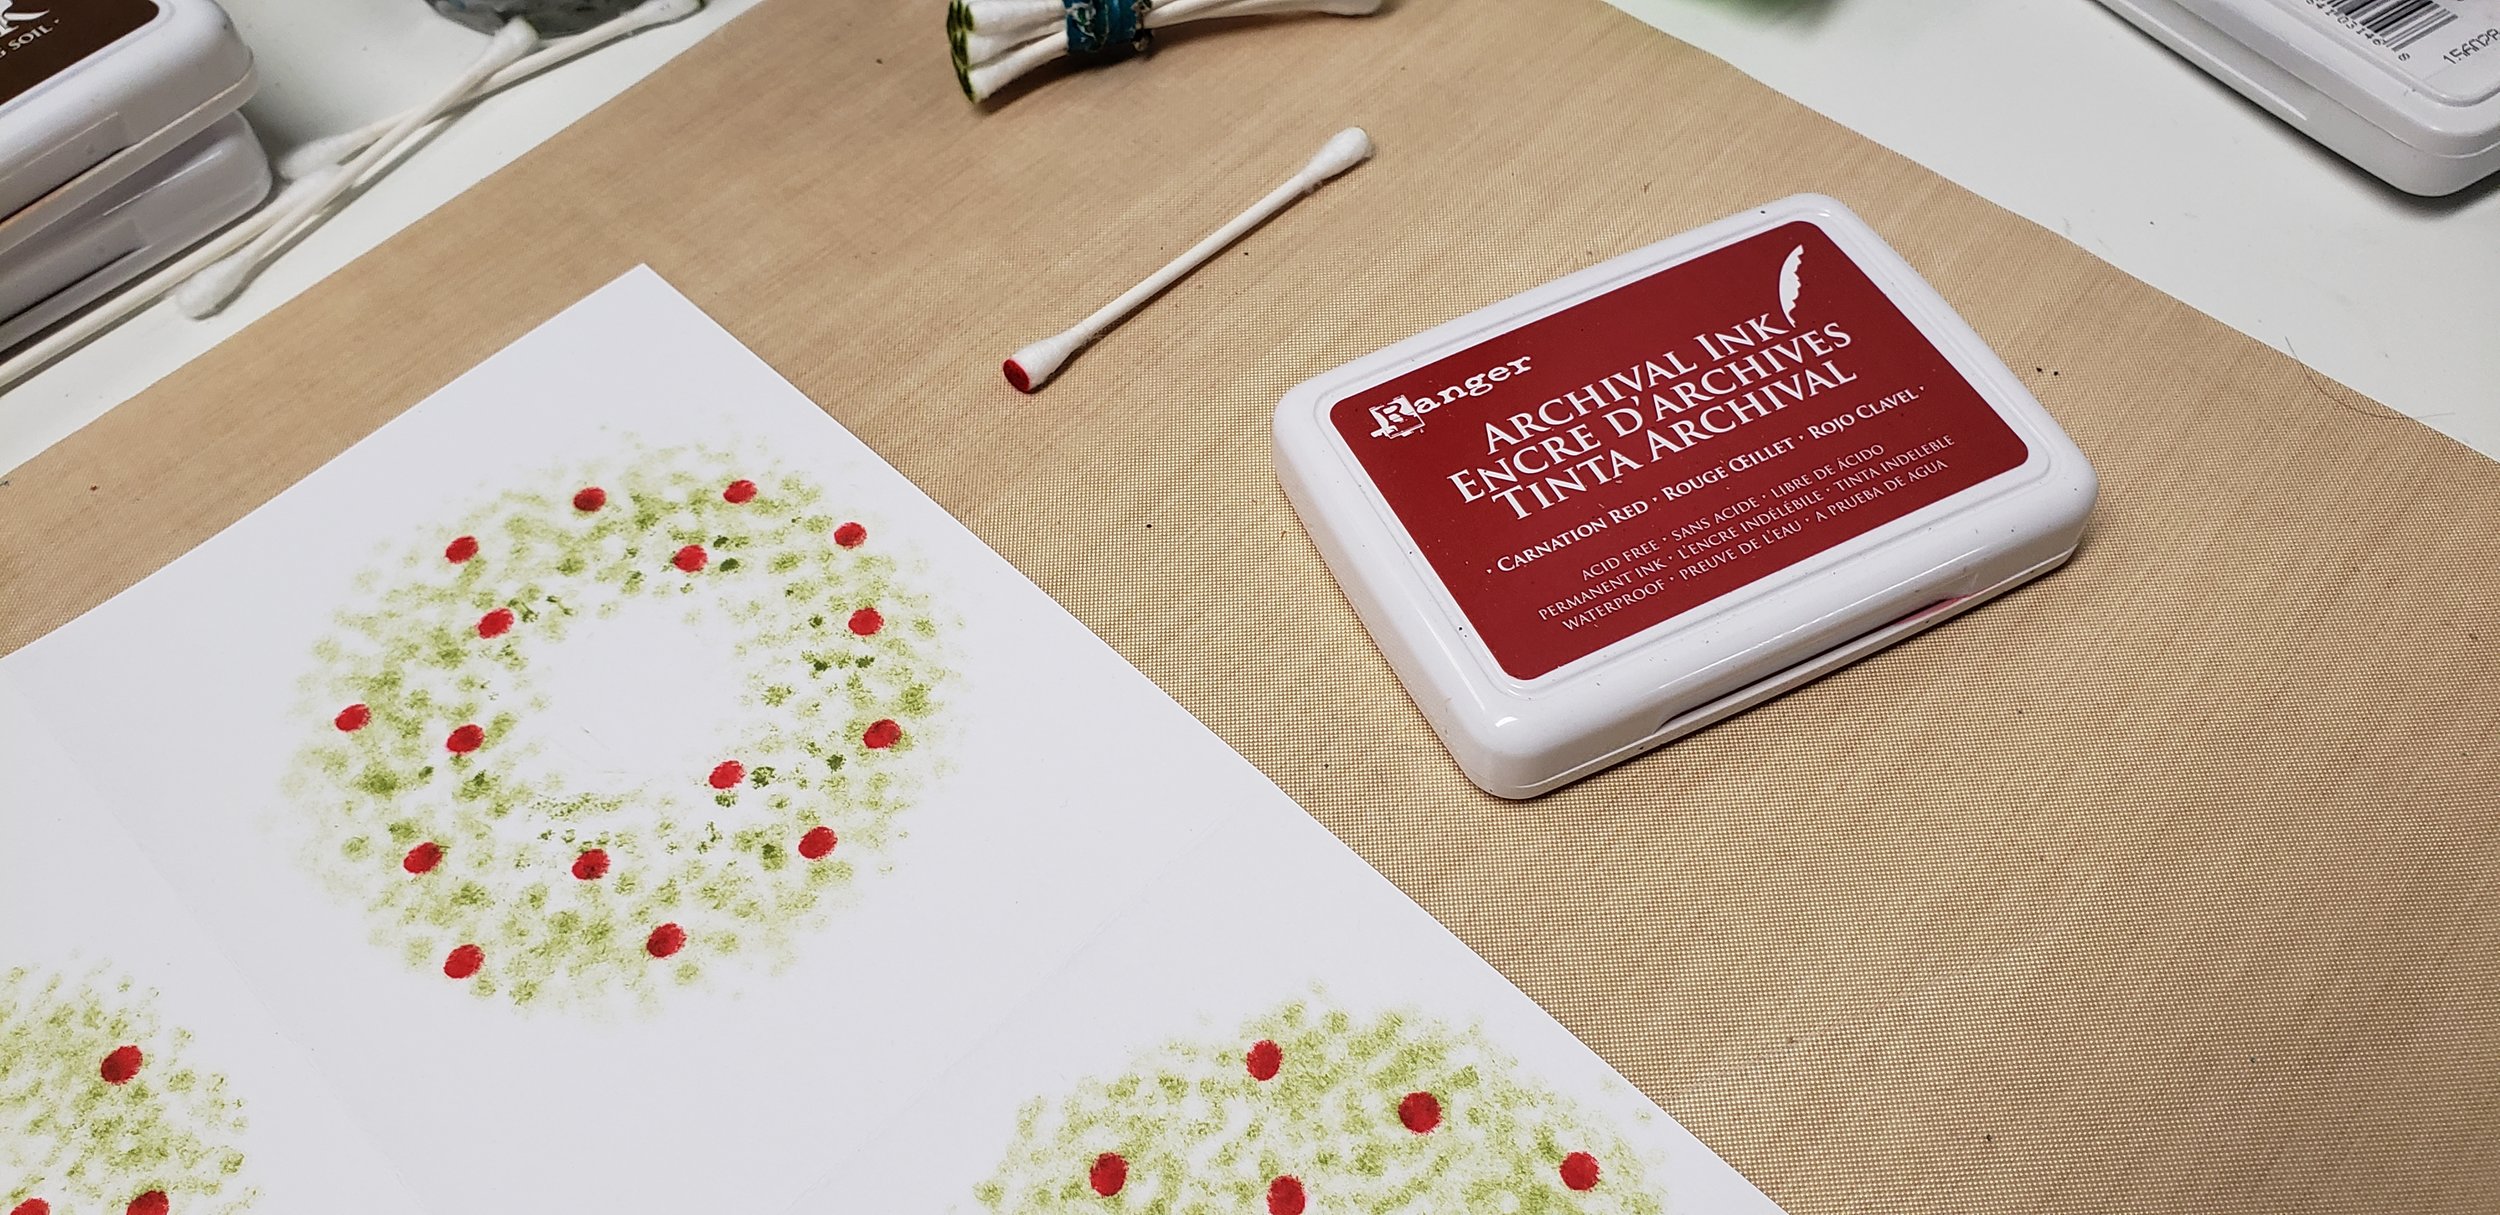
Use the Q-tip to stamp ornaments into the wreath.
Next, take your red ribbon, and tie little bows, that will later be glued onto the bottom of the wreath.

Tie little red bows, but don’t glue them down yet!
Using a Christmas stamp of your choice, stamp on your Christmas wishes beneath the wreath, keeping in mind the “tails” of the bow. If you stamp too close to the wreath, the ribbon tails may obscure it. I used a stamp bought from Target.

Stamp on your Christmas wishes!
After stamping, you’ll next glue down your bows. Now, you can either cut your squares out, then glue them down, which will potentially save you the pain of the bow getting accidentally ripped out or off when using the paper cutter or scissors, or you can just glue on the bows, and when you cut them out, carefully use the paper cutter or scissors so the bows don’t get accidentally snagged.
Either way, when you cut them out, cut along the folded lines.

I glued the bows on, then cut out the squares along the folded lines with scissors.
Set your wreaths aside, and while the glue is drying, we’ll now work on the inside.
Take your second piece of white card stock, and once again, fold it horizontally, open it up, then fold it vertically, so that you have four squares.
Using another Christmas wish stamp, stamp near the top of each square. Then cut each one out, using a paper cutter or scissors, and cutting along the folded lines. You can also use an edge punch to give a little more interest to the inside, and contrast the corners of the cover.

This will be the inside of your card.

Use an edge punch to add a little more interest.
Now, take your red card stock, and fold it in half horizontally. Retrieve your cut out wreath squares, and glue or use double-sided tape to stick the wreath square onto the outside flap of the red card stock along the FOLDED side. Then using a paper cutter or scissors, cut off the excess paper, leaving a bit of room to make a frame around the wreath.

After gluing to taping your wreath card onto the card stock, cut off the excess but leave some room to frame the wreath.
Once the cover is glued or taped on, open up the card, and glue or tape the inside page.

The inside cover of your card.
The card is complete!
Now for the envelope, I used a template but you can use commercially bought envelopes or use other techniques to create it. When using the template, use your card to measure against the template to make sure you’re using the right size. Then, using a patterned paper of your choice, trace out the template on the back of the paper, cut out along the traced lines, then fold accordingly.

This envelope uses the 5.25 x 7.25 template.

Trace out the template on the back of a patterned paper.

Fold your envelope and glue or tape down the flaps. Don’t forget to leave an opening!
And you’re done! If you hand deliver your card, you can use a Christmas sticker in the place of stamp, and use washi tape to hold the flap down. Washi tape is great for this because it’s super easy to open and close, without ripping up the envelope.
I don’t recommend mailing it if you’re using patterned paper, as this paper is usually thin, and not durable enough to traverse the great wilds of mail-dom.
I hope you enjoyed this tutorial! Let me know how your cards turned out, and you just may get featured on my blog or other social media!
Happy Crafting!
Yoli

A nicely folded envelope, ready for a handmade card!

Washi tape makes a great seal for hand delivering cards!