Layer by Layer

Layering is both easy and hard!

Knowing how to layer, is a skill learned so well it becomes intuitive. I learned--and am still very much learning!--how to layer by essentially copying the techniques of those I admired. If you have time, check out France Papillon, who does amazing art journaling, Sigita Grunte, who does gorgeous vintage-style junk journaling, and Roben-Marie Smith, who creates beautiful and bright art and junk journals!

I started my mixed media journey in 2015, and I started with trying out art journaling. At the time, I didn't have a journal or anything, so I was using single pages. They're pretty embarrassing to look back at now, but here's the very first one I did:

First ever art journal page.

First ever art journal page.

See how flat this looks? Not to mention non-cohesive? There was no central theme to this. It really was just using what I had and trying to figure how how they worked. And that's a big part of it. Knowing how to layer is first knowing how your materials work. For example, washi tape is called a tape, but often you need to glue it down. 

My style has since evolved, and now that I'm junk journaling as well, I've taken a liking to the sort of vintage, shabby-chic style. I've a long way to go, but I've learned a few things that I'm going to share with you.

There are many videos out there that can show you how to layer. And layering can get super complicated, or be rather simple. But what about the videos that show something you really like and want to try, but don't necessarily show you how they did it? 

You have to deconstruct it!

So let's begin with something along the basics, and try something simple.

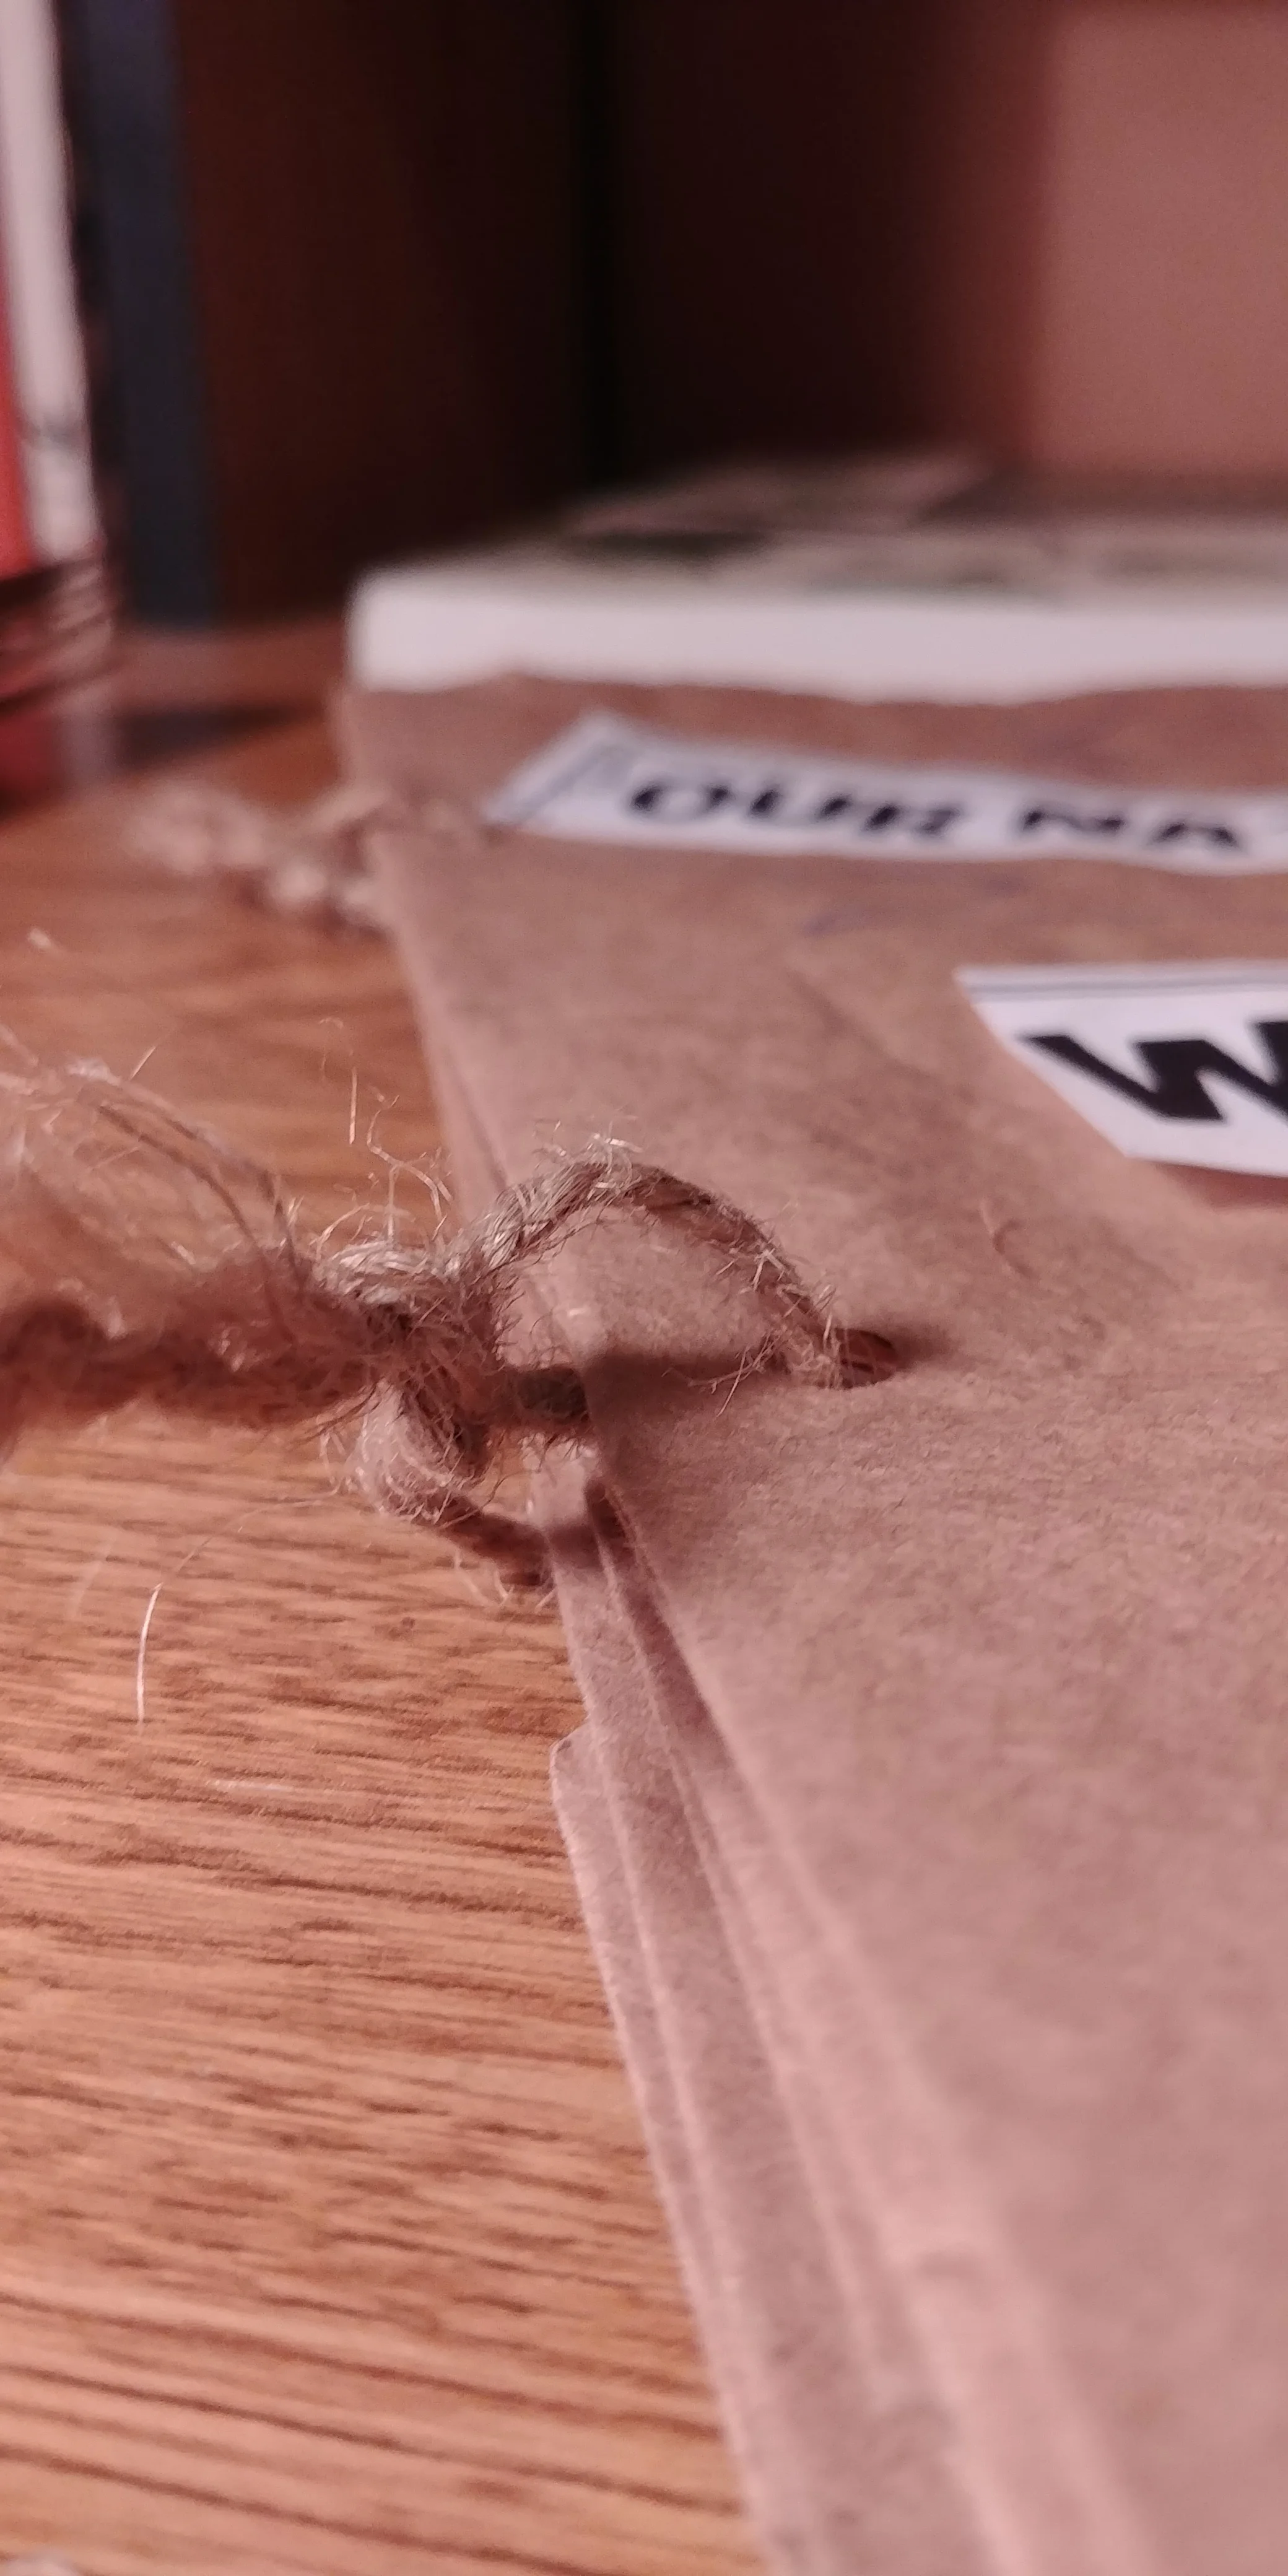
Here's a binder insert I made out of scraps:

Front of binder inserts.

Front of binder inserts.

How would you deconstruct this? After all, there’s no “how-to” on how to make this. But it’s actually easy. The simple things are, the more complicated they look.

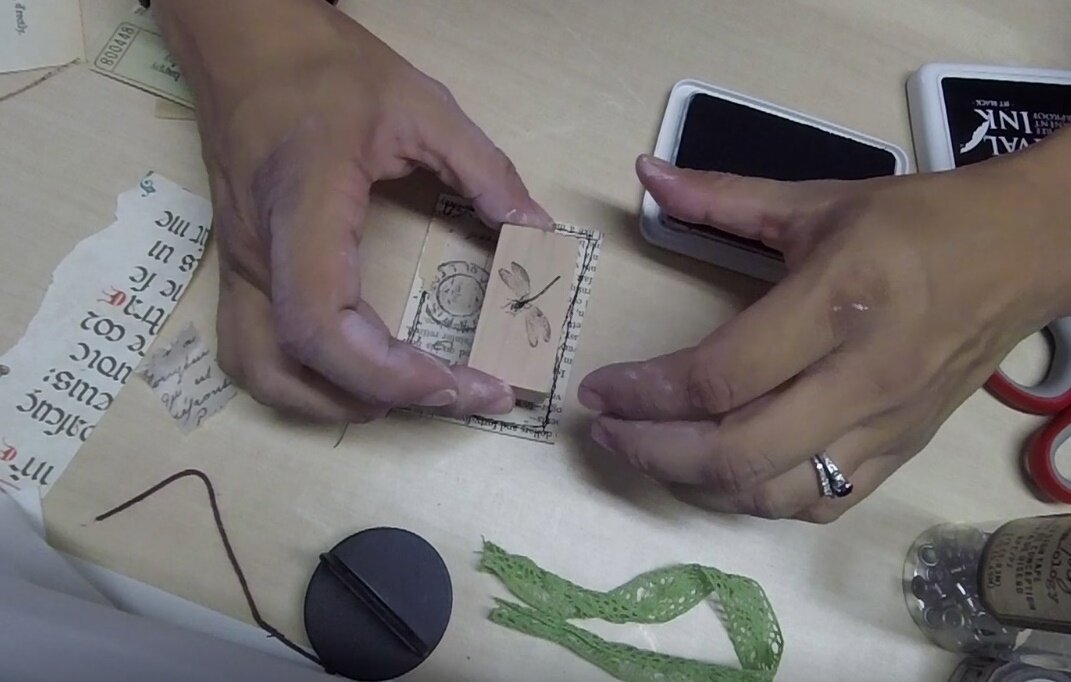
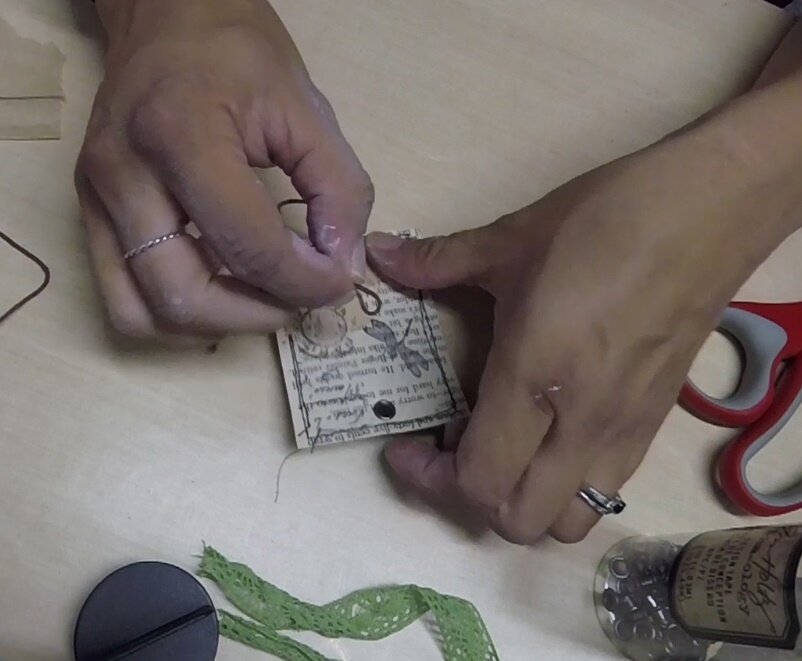
Let’s look at the tag on the left first. What do we see?:

*Paper base that’s kind of bookmark like (the tag itself essentially)

*Stamping

*Sewing

*Cheese cloth

*Scrap paper with words on it

*Dried flower

*Washi Tape

This tag, though maybe complicated looking, actually only has seven elements to it. The next key is to figure out the order.

What looks like it came first? Probably the sewing onto the paper base. Unless you’re sewing something onto it, that’s typically the case. Okay, so sewing first, then what? In this case, I stamped the dragonfly first, because I was trying to figure out what to do. So here we can say the stamping could have come first, or, as is also typical, it came last.

Cheese cloth usually is behind something, and here is no different. So after sewing around the edges, we glue down the cheese cloth. The words on the paper came from an old postcard. You can see the rips around the edges, indicating that a portion was ripped off and then glued onto the cheese cloth. We can see the flower is then placed on top (it was glued on), then a piece of washi tape placed so as to look as if the flower is taped down. Then another stamp of the bee, which again, could have been done first as well as last.

Now, let’s look at the second tag.

What elements do we see?:

*Paper strip like a bookmark

*Negative die cut with rough but not ripped looking edges

*Sewing

*Word stickers

*Washi tape

*Letter stamp images

Since the layers, like the washi tape, can be seen going over the sewing, we can deduce the sewing came first. So that’s the first step. After that, we can see the washi tape and the letter stamp images are on top of the negative die cut, which likely means (in this case yes) the negative die cut came next. After that’s glued on, since everything else looks a bit free floating (as in, the washi tape isn’t touching the letter stamp images and the words aren’t touching anything) it’s a bit more difficult to know what came next. But it’s also at this point, that smaller elements are put down after the larger ones.

Stickers are often the next layer, and in this case, the letter stamp images are two stickers kinda looking like one big one. The circle postage sticker was bigger than the square stamp, so I put the circle down first, then the square.

Washi tape is used to accent, so that came next. Then, since the top was blank, I used the word stickers to balance the over all blocky-ness because it was two small rectangular pieces.

Sometimes deciphering the layers is tricky, especially when there are a lot of them. But learning to pick out the elements one by one, and working out how and in what order they might be placed, helps to develop your intuition for layering. As you get more practice, you’ll develop the eye for it, and soon, your own style!

So, how many elements do you see in this one? And in what order do you think they were placed? Let me know in the comments!

A simple cover

A simple cover

A Funeral For Sewing Machine...

Dearly beloved, we are gathered here today to remember our good and humble companion, Sewing Machine, felled upon this November day.

Although cheap and unsophisticated, Sewing Machine nevertheless persevered through the endless toil and ceaseless demands of mixed media and junk journaling. Sewing Machine was not fancy, did not care for fancier stitches than straight and zig zag, and always hummed in--albiet loud-- rythm to whatever work Sewing was doing.

Sewing Machine never got to go beyond 3 types of stitches, but that never stopped Sewing from doing the best 3 types of stitches possible.

Let us not weep for what now can never be, but rather, let us smile in remembrance of what Sewing accomplished, during the brief, but fruitful, 2 (possibly 3) years, that Sewing was with us.

Let us now pray, for Sewing Machine's (ruthless) owner, who will now be Sewing Machine-less, and will have to suffer great hardships until a replacement is got through the blood, sweat and tears of money-earning labor...or until she uses some heathen methods of machine necromancy.

Thank you.

10 Minute Journaling Tag Tutorial

Hello everyone!

A busy person who happens to also be a crafter…is…well…busy! Meaning sometimes there is no time to craft. Sometimes though, there’s a 10 minute window.

This tag, is for that 10 minute window.

The YouTube tutorial can be found here: Make a tag in 10 minutes! -- A 10 min Craft video

But just in case, here’s the written version!

Enjoy!


The first step, is to gather materials:

  • Ephemera

  • String

  • Book pages (about 5 or 6)

  • Glue

  • Gesso

  • Crop-a-dile or something similar

  • Eyelets

  • Sewing machine

  • Scissors

  • Stamp

  • Stamp pad

  • Washi tape

Just a few things to make a quickie tag!

Just a few things to make a quickie tag!

Step two:

Sew the 5 or so book pages together in a small square using the sewing machine.

Bundle the book pages all together, and sew a small square.

Bundle the book pages all together, and sew a small square.

So that it looks like this:


About 5 book pages sewn together.

About 5 book pages sewn together.


Step three:

Cut out the square

Cut out the square.

Cut out the square.

Step four:

Glue some ephemera and add some washi tape.

In this case, I just added a piece of torn book page (from a different book. You can see that it’s darker than the pages used to make the main tag part). Then I added a bit of washi tape.

Add some elements to your tag.

Add some elements to your tag.

Step five:

Stamp on an image.

Here I used a small dragonfly stamp and archival black ink.

Stamp on an image.

Stamp on an image.

Step six:

Punch a hole at the top and add an eyelet.

Punch a hole and add an eyelet

Punch a hole and add an eyelet

Step seven:

Use some string (which is what I used) or ribbon and thread it through the eyelet, then tie off.

Thread some string through the eyelet.

Thread some string through the eyelet.

Step eight (final step):

Add some gesso on the back to create a blank space for writing on.

Add some gesso on the back of the tag.

Add some gesso on the back of the tag.

And that’s it! You’re done! Woo hoo!

A tag made in ten minutes!

A tag made in ten minutes!

I hope you enjoyed this little tutorial! Let me know what you think, and how it went for you! Feel free to send me pictures of your tags too! That’d be awesome and I’ll share it in the blog!

Now get back out there and do whatever it is that you had a ten minute break from with renewed vigor and satisfaction!

Cheers!

A Crafter's Space

A man's home is his castle.

A woman's home is her sanctuary. 

Writers, musicians, artists and crafters all have in common the need for a space that is dedicated to their craft. We need that space where our messes won't be untimely cleaned, where our creativity is left to be explored and broadened unhindered--if only temporarily--by the realities of responsibility and constraint.

For an artist crafter it's in our space that we can cuss out the world in paints and inks, sob out our hearts in paper and lace, or dance out our joy in markers and ribbons. 

When we're in that space we can put ourselves in the zone, the kind that speeds up time so fast we're surprised when we finally look up at the clock or someone tells us it's time to go, to cook dinner, to bathe the kids.

So what happens when that space is gone?

In the time between moving and unpacking I felt uncreative and a bit lost. I had no space to allow myself the freedom to detach. I don't have friends I could hang out with, let alone friends I can craft with, so there wasn't anything on "the outside " to distract me. It was depressing, to say the least.

But little by little and with the help from my wonderful husband, my space was slowly built and unpacked, sorted and put away. It's amazing--by which I mean it's strange--how once that was done I felt my creativity coming out again. 

New Space

New Space

And yet it wasn't something I could jump back into with full force. I had to approach my creativity slowly, not because it could be chased away, but because it was almost like seeing someone who was my childhood friend whom I hadn't seen for 20 years. I knew it, but didn't know it as well anymore. 

I started slowly, doing just the simple things that didn't require much thought. Just doing some coffee dying and the like. Plus, with a newborn added to our family, not much time can be spared anyway. 

The important thing though, is that as I befriend my creativity I'm once more regaining my sanctuary. 


Crafter's Block Sucks

We've all heard of writer's block. And writing is a type of craft, so it's no surprise that "crafter's block" is a very real thing. It manifests in various ways and how we handle it can also vary.

I had mine at the worst time. This is what happened...

It was nearing December. I was about to restart and renew this website, my blog, my art--I even finally made a Facebook page. I contacted a twice-time customer (which made me really happy) and let her know new things were coming into my shop.

Beginning of January 2019 came, and it was like a dam broke open and everything art related got washed downstream. 

The first situation I probably should have known would be the start of it, and that's when we moved. All my art things, projects I was in the middle of, everything got packed away. Sure I was excited to move into our first house, but I'm sure you can understand how stressful it is too.

Slowly, we sorted and put away the contents of our moving boxes. It took a year and a half. Seriously, I finished unpacking and cleaning the garage literally three weeks ago from the writing of this post. 

Instagram post of moving in


But anyway, ok, so we moved. The beginning of January I’d given my two weeks notice, quitting a job I had thought to be at for years, to make a career out of. These kinds of decisions of leaving what’s more or less stable for something new, when you know you need to for your mental, emotional and spiritual well-being, is always a tricky thing to navigate. Despite my overall successes at my workplace, despite what I had accomplished, it wasn’t enough for folks, and the last two weeks ended up being...difficult to say the least. 

During this time, I still was managing to create. Mostly for my own sanity. Not everything was unpacked, I was limited. But I was doing it.

Nonetheless, I transitioned out of the job into a panic for almost two months at not having the job yet that I was supposed to be going into.

I found out I was pregnant late January, which I was happy about but again, stressed about also. So many new things happening at once!  By the time summer came, I was six months pregnant and my "studio", 50% built and unpacked, and also in the garage, was unfortunately far too hot to work in. My new job had (finally) started in March and I was traveling a lot, often as far as two hours away.

I posted a few times in January, and only one creative thing in February. That was it. My next post wouldn’t be until September, but it wasn’t a creative object.

Ultimately, I had no time or energy, and crafter's block set in. I stopped watching YouTube, stopped looking at Instagram, stopped trying to unpack my art from boxes, stopped looking at the Junk Journal Junkies Facebook group. 

I just...stopped.

And that's what a block like this can do: make you stop doing the thing you thought made you happy, because you suddenly realize it doesn't and no one else cares about your stuff and it's all gonna end up in the garbage when you die so what's the point?

Brutal thoughts. Whether true or not. Often not. But a depressive state does not allow for logical and obvious thoughts such as: this is temporary, it’s not a waste, it’s not useless, etc. etc..

It wasn’t until I was eight months, that I started cleaning again. Thank goodness for the “nesting” instinct that kicks in when pregnant! Of course, sorting and cleaning everything is all the more difficult when you’re that far along, but I had to get it done before the baby came. If not for that instinct, I probably wouldn’t be done still.

My daughter was born late September. A week after I was done with the garage. See? Miracles happen!

Xayah is born.jpg


After her birth, the block cracked open, and for whatever reason I can’t explain, the urge to create returned. I made my first Instagram post in seven months, though it was about my daughter being born, which, I guess technically, is something I helped create? Hahaha, but not something crafty.

So here I am, trying to pick up where I left off. It’ll be slow going (after all, four kids and a job makes for a busy life), but at least I AM going.

I thank you for your understanding, and for your support.

Cheers~


Easy Christmas Cards

Sometimes Christmas comes sooner than a busy person realizes! But there’s still nothing like creating and gifting a handmade card! This easy step-by-step tutorial can be used not just for Christmas, but any “wreath” occasion!

This post contains no affiliate links.

2018 Christmas cards

What you’ll need:

*Paper cutter or scissors

*2 white pieces of cardstock

*1 red Cardstock

*Green archival ink

*Red archival ink

*Q-tips

*Red ribbon

*Christmas quote stamps

*Glue or double sided tape

*Paper of choice for envelope (optional)

*Envelope template (optional)

*Washi tape (optional)

*Christmas stickers (optional)

Let’s make the card! This card-making recipe makes 4 cards.

The first step is to fold one sheet of white card stock horizontally, then open it, then fold it vertically, so that you have four equal squares.

Next, take a Q-tip, and press it into the green archival ink, then use it to stamp a wreath in a circle on one square of the card. The picture shows several Q-tips and that can work too, but I actually found it much easier to just use one.

I ended up using just one Q-tip instead of a bundle, but either way works.

I ended up using just one Q-tip instead of a bundle, but either way works.

Once you have all four squares with their wreaths, take a clean Q-tip and press it into the red archival ink, then stamp it into the wreath to create the ornament feel. You can stamp as many or as little red ones as you like.

Use the Q-tip to stamp ornaments into the wreath.

Use the Q-tip to stamp ornaments into the wreath.

Next, take your red ribbon, and tie little bows, that will later be glued onto the bottom of the wreath.

Tie little red bows, but don’t glue them down yet!

Tie little red bows, but don’t glue them down yet!

Using a Christmas stamp of your choice, stamp on your Christmas wishes beneath the wreath, keeping in mind the “tails” of the bow. If you stamp too close to the wreath, the ribbon tails may obscure it. I used a stamp bought from Target.

Stamp on your Christmas wishes!

Stamp on your Christmas wishes!

After stamping, you’ll next glue down your bows. Now, you can either cut your squares out, then glue them down, which will potentially save you the pain of the bow getting accidentally ripped out or off when using the paper cutter or scissors, or you can just glue on the bows, and when you cut them out, carefully use the paper cutter or scissors so the bows don’t get accidentally snagged.

Either way, when you cut them out, cut along the folded lines.

I glued the bows on, then cut out the squares along the folded lines with scissors.

I glued the bows on, then cut out the squares along the folded lines with scissors.

Set your wreaths aside, and while the glue is drying, we’ll now work on the inside.

Take your second piece of white card stock, and once again, fold it horizontally, open it up, then fold it vertically, so that you have four squares.

Using another Christmas wish stamp, stamp near the top of each square. Then cut each one out, using a paper cutter or scissors, and cutting along the folded lines. You can also use an edge punch to give a little more interest to the inside, and contrast the corners of the cover.

This will be the inside of your card.

This will be the inside of your card.

Use an edge punch to add a little more interest.

Use an edge punch to add a little more interest.

Now, take your red card stock, and fold it in half horizontally. Retrieve your cut out wreath squares, and glue or use double-sided tape to stick the wreath square onto the outside flap of the red card stock along the FOLDED side. Then using a paper cutter or scissors, cut off the excess paper, leaving a bit of room to make a frame around the wreath.

After gluing to taping your wreath card onto the card stock, cut off the excess but leave some room to frame the wreath.

After gluing to taping your wreath card onto the card stock, cut off the excess but leave some room to frame the wreath.

Once the cover is glued or taped on, open up the card, and glue or tape the inside page.

The inside cover of your card.

The inside cover of your card.

The card is complete!

Now for the envelope, I used a template but you can use commercially bought envelopes or use other techniques to create it. When using the template, use your card to measure against the template to make sure you’re using the right size. Then, using a patterned paper of your choice, trace out the template on the back of the paper, cut out along the traced lines, then fold accordingly.

This envelope uses the 5.25 x 7.25 template.

This envelope uses the 5.25 x 7.25 template.

Trace out the template on the back of a patterned paper.

Trace out the template on the back of a patterned paper.

Fold your envelope and glue or tape down the flaps. Don’t forget to leave an opening!

Fold your envelope and glue or tape down the flaps. Don’t forget to leave an opening!

And you’re done! If you hand deliver your card, you can use a Christmas sticker in the place of stamp, and use washi tape to hold the flap down. Washi tape is great for this because it’s super easy to open and close, without ripping up the envelope.

I don’t recommend mailing it if you’re using patterned paper, as this paper is usually thin, and not durable enough to traverse the great wilds of mail-dom.

I hope you enjoyed this tutorial! Let me know how your cards turned out, and you just may get featured on my blog or other social media!

Happy Crafting!

Yoli

A nicely folded envelope, ready for a handmade card!

A nicely folded envelope, ready for a handmade card!

Washi tape makes a great seal for hand delivering cards!

Washi tape makes a great seal for hand delivering cards!

Nature Journaling with kids

I love journaling, whether it's with art journals, or junk journals, or nature journals or other. And usually, when you love something, one of the best things you can do is to share it. I really want to instill a love of nature in my kids and though I doubt how successful I'll be, it's still something I'm aiming for. 

So one thing I tried today, was kid nature journaling. It of course had to be something really simple, especially for my 2-year old, who's attention span is very much shorter than my 4-year old. And although 1-year olds are fully capable of enjoying nature, I was going to let my youngest just enjoy the sights and sounds from a stroller.

Thank goodness for Pinterest! Such a quick and easy way of finding inspiration and ideas! And thus armed with the knowledge only accomplished by a 2 minute search, I set out to have the kids create their own nature journals.

What I used:

  • Paper lunch bags
  • Glue
  • Free Printables (in my case from themeasuredmom.com)
  • Crayons
  • Jute string

First, I had them glue the printables onto the paper bags (I suggest that if you have kids as young as mine, you have some baby wipes nearby to clean up the glue that inevitably gets on the table). I had to cut the printable to size but it actually worked out in the end because it wasn't as overwhelming as a larger sheet, and it was easier for them to work with. I also had them glue down the little flap at the bottom of the bag.

Park Boys gluing free printables.             © Yolanda Park

Park Boys gluing free printables.             © Yolanda Park

Next, we (read "I") hole punched two holes on near the top, one near the bottom. I didn't really measure it out, so if I had to guess I'd say maybe 3 inches from the top, and 3 or 4 inches from the bottom. Then we strung the jute string through the holes and tied a knot. 

Finally I busted out my box of crayons (not theirs because I actually use these for work when needed) and had them color. It was then that I realized how little they have an opportunity to color...er...we'll work on that!

Alexander showing off a really big crayon. © Yolanda Park

Alexander showing off a really big crayon.

 © Yolanda Park

Once the books were done, we piled in the car to visit a friend of ours, who lives next to a regional trail. 

It was amazing how excited they were to use their nature books! I was really jazzed at how they were looking for items on their little checklists, and be so happy to find it and check mark it off. And of course, since the pages were lunch bags, they could put little treasures inside such as acorns, leaves, and of course, the extremely necessary stick.

My 2-year old stayed engaged longer than I expected, though he did eventually lose interest, unless he found something he wanted to save. My 4-year old was engaged for a long time, and even when he was done with it, he was still noticing more than he had before.

Overall, I think this was not only a success, but also an awesome way to spend an hour with my kids. I think as long as we can do this a few times a month, or even other nature projects, they'll be on the right track!

Have you ever made nature journaling books for kids? Or do you go out and nature journal yourself? What do you like or not like about it? Let me know!


Ezekiel's and Alexander's nature journals.                                                                       © Yolanda Park

Hello and Welcome!

Hello there! 

Thank you for visiting my store! I'm proud to start this new venture and am very appreciative of your taking the time to browse (and hopefully purchase) my available items. Feel free to email me with questions at any time, and don't forget to stop by my social media, where I show new inventory, and various crafts being made! 

Enjoy!

--Yoli